Creatium Studio User Guide
User GuideCreating and exporting an interactive video
Creating and exporting an interactive video
Creating and exporting an interactive video
What you’ll learn
How to build an interactive video lesson in Creatium Studio. This guide follows the four stages every lesson moves through:
- Create the draft from a topic or your own materials.
- Edit the slides and add interactive elements.
- Generate the finished video.
- Publish and share it with your learners.
Creating your interactive lesson
Step 1: Create an interactive lesson
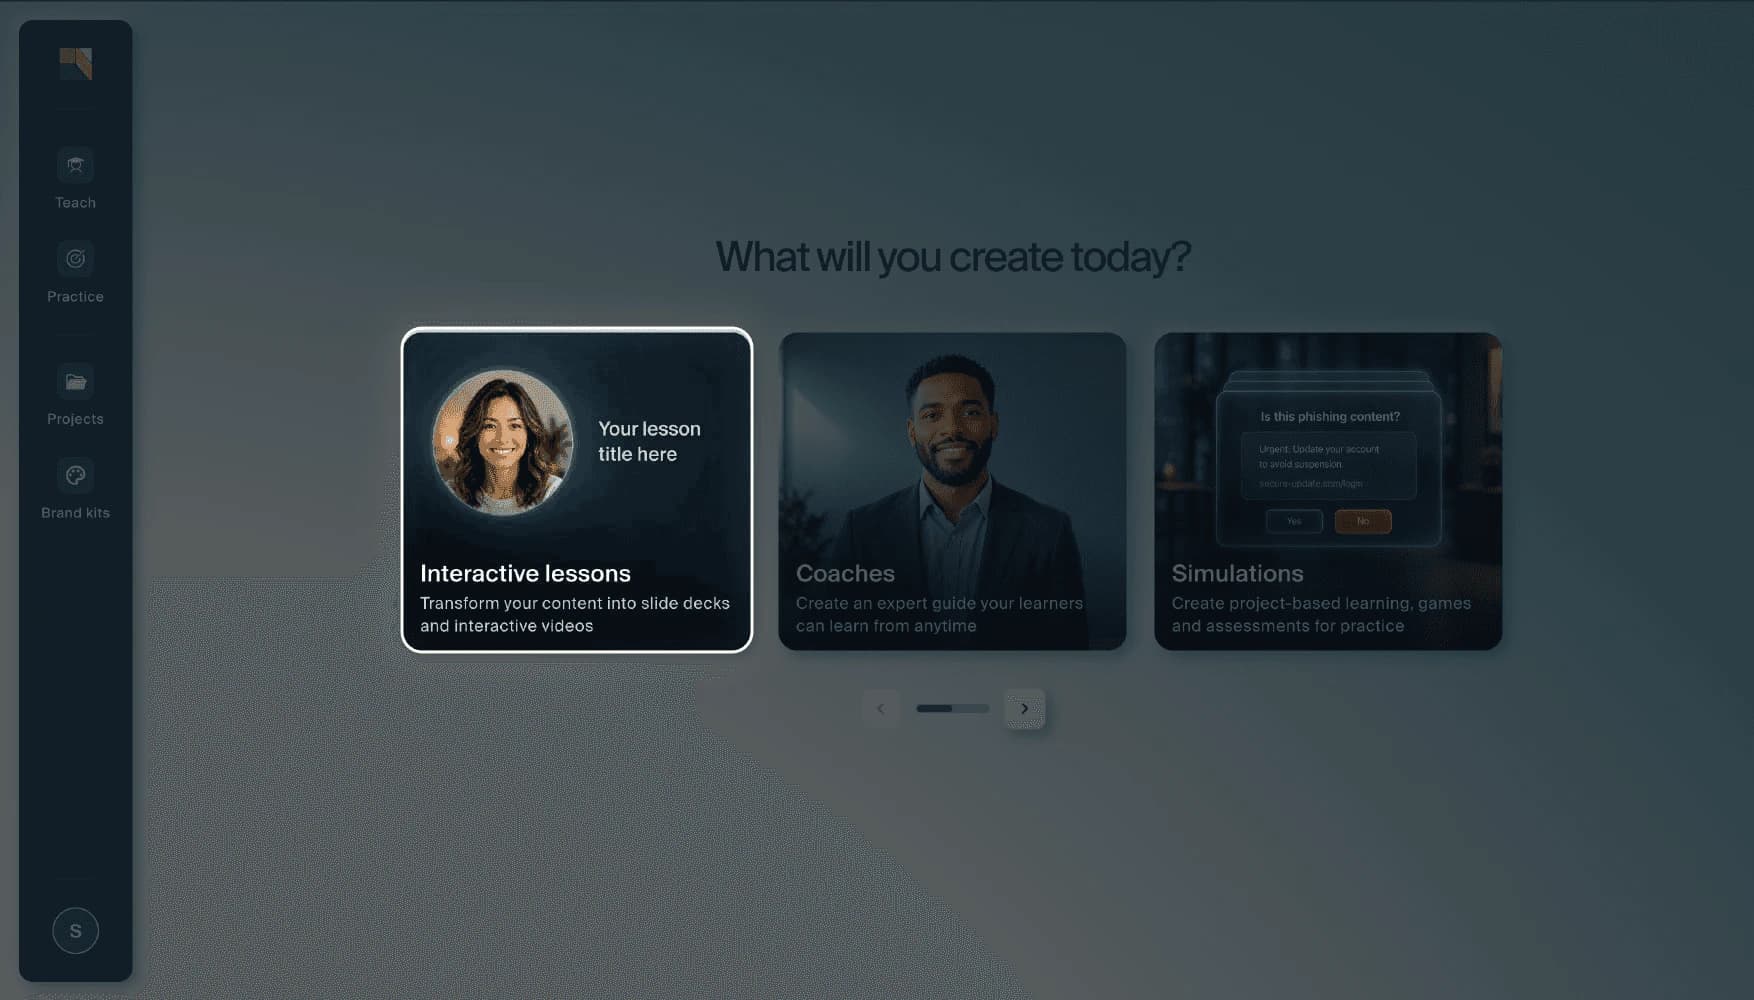
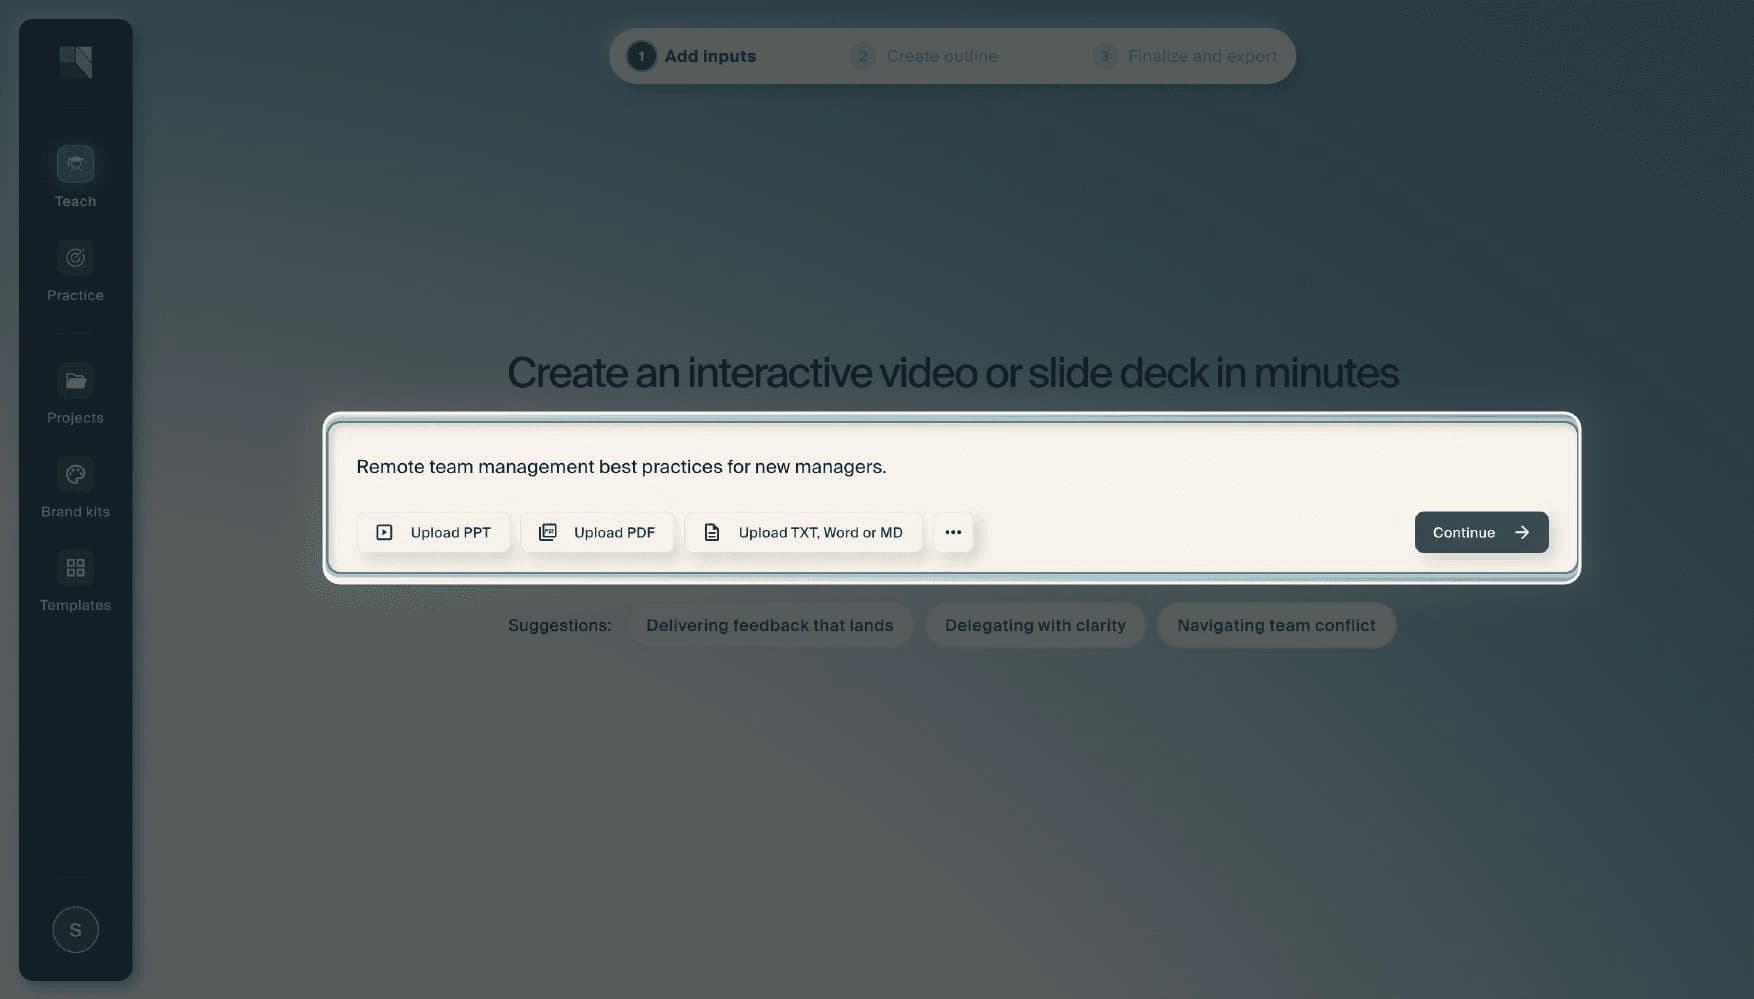
From the Creatium Studio home page, click the Interactive lessons card.
Step 2: Choose how you want to begin
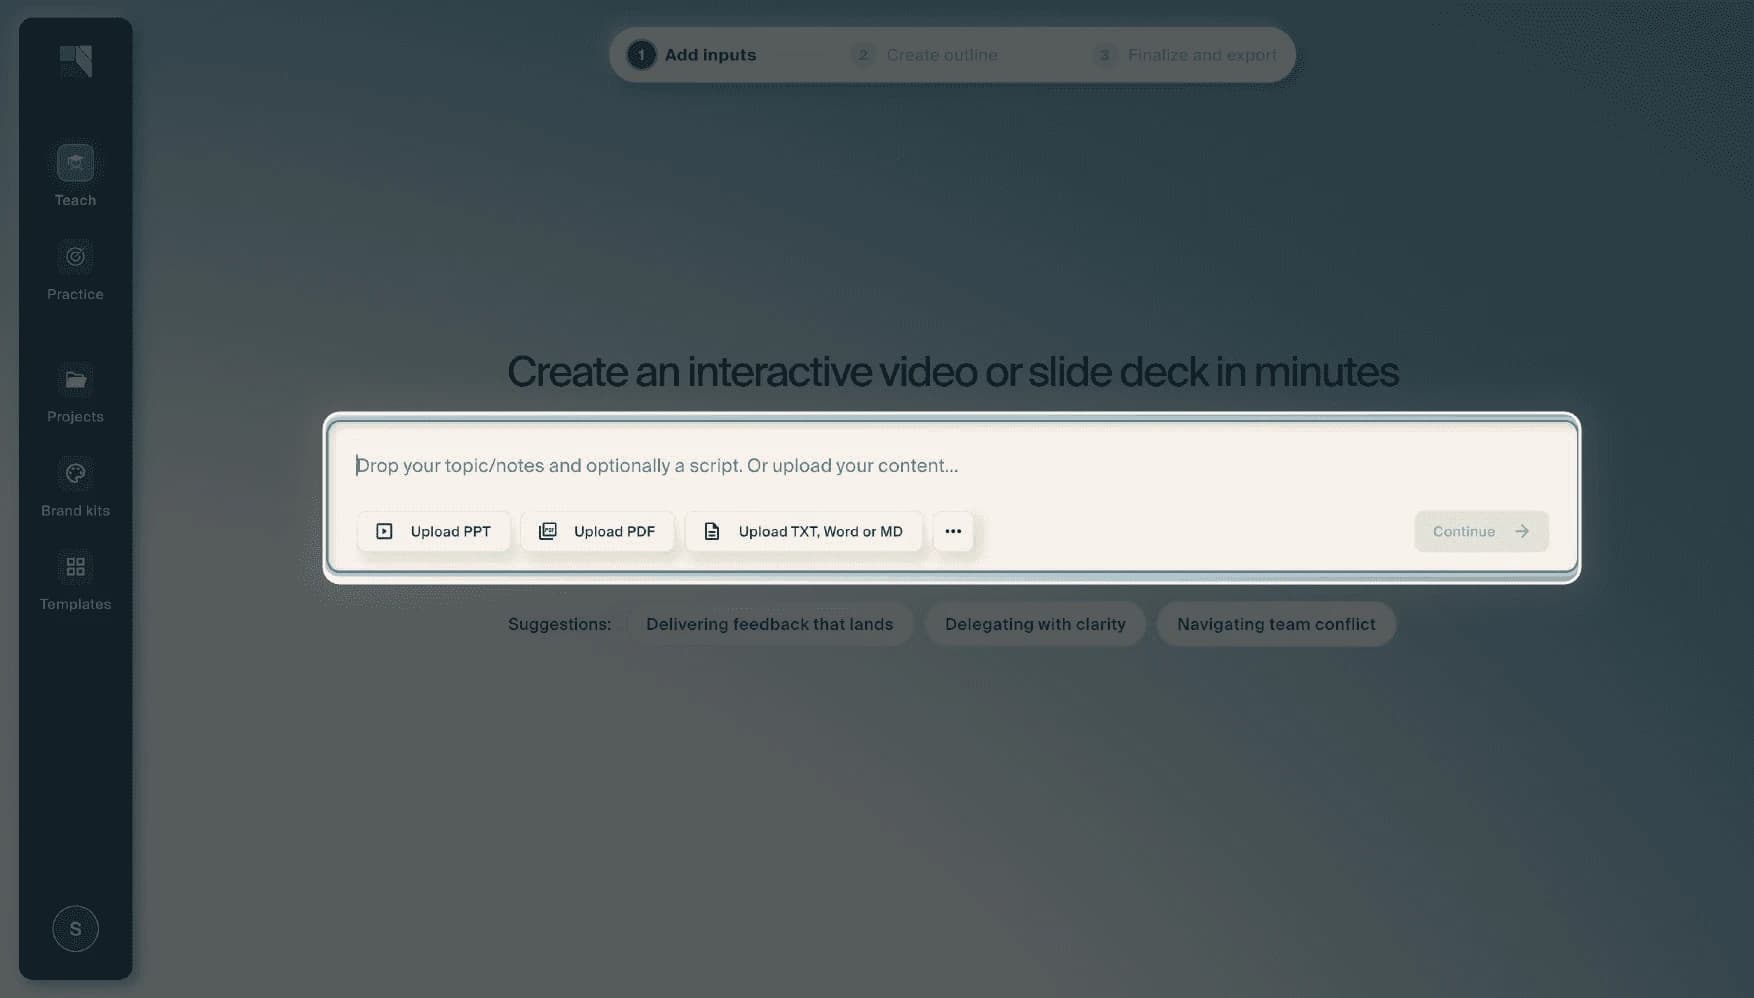
Pick the starting point that fits your material:
- Prompt with AI: describe your topic and let Creatium generate the lesson outline.
- Add your own text: Upload a script you already have. Use this when you have existing documents or material.
- Upload a slide deck or PDF: Bring your existing slides or upload a PDF, and Creatium drafts the lesson, drawing on the material you provide.
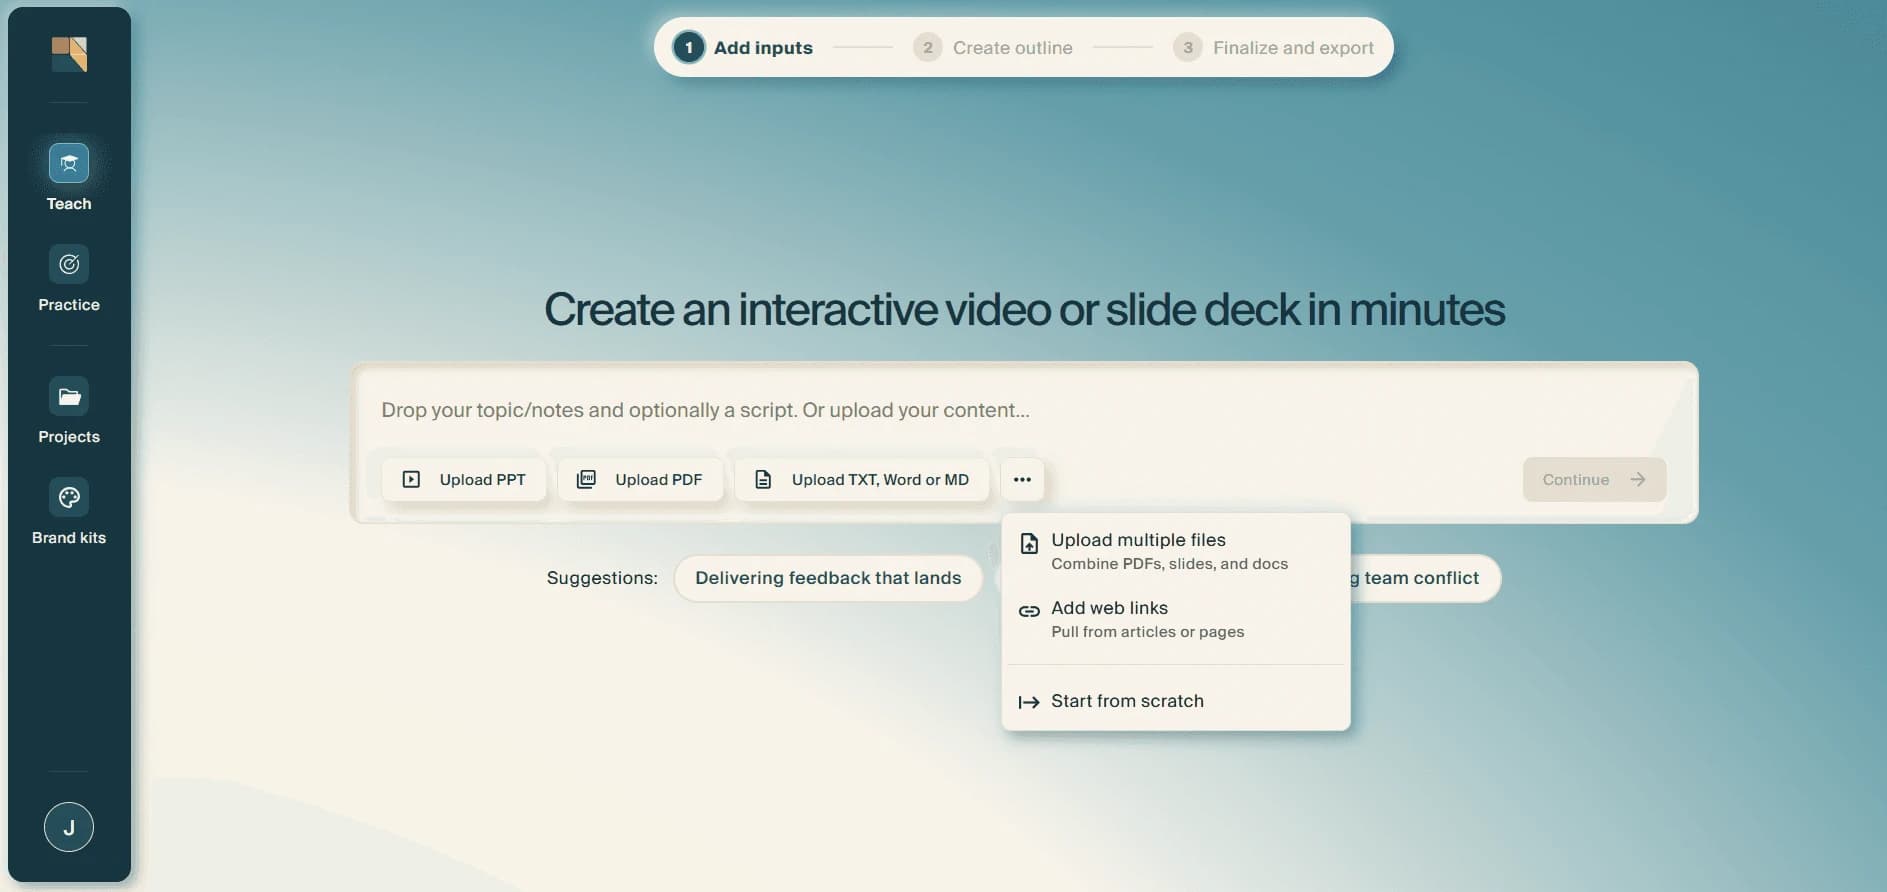
- Upload multiple files: Combine PDFs, slides, and docs into a single lesson.
- Add web links: Pull content from articles or pages to use as source material.
- Build from scratch: Start with a blank canvas.
You have multiple ways to get started, so choose the option that works best for your material.
Step 3: Review and select Continue
Review your input before moving on. The more specific your prompt or source material, the closer the draft will be to what you need. When you are happy with your input, select Continue.
Step 4: Define your lesson topic further
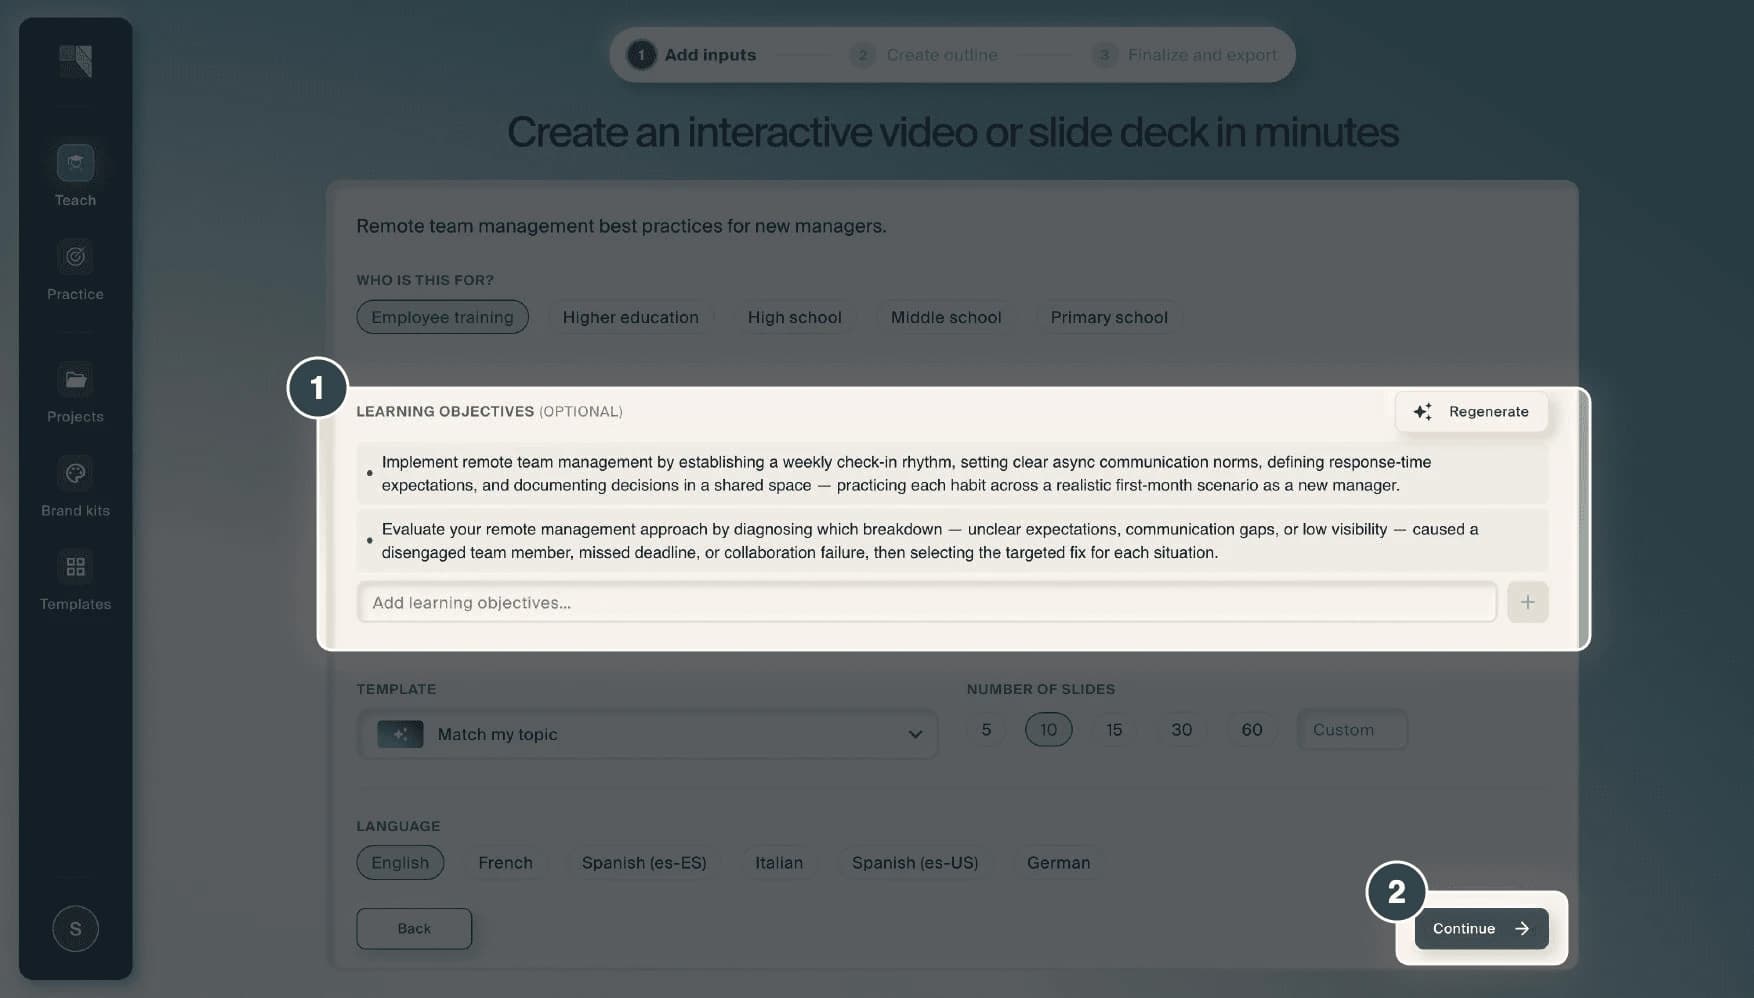
Set the details that shape your lesson, then continue:
- Set your learning objectives. Type your own objectives, or choose Suggest to have AI draft them for you. On the same screen, choose the other lesson settings: your audience type, the template, the number of slides, and the language.
- Select Continue to generate your outline.
Step 5: Review your lesson outline
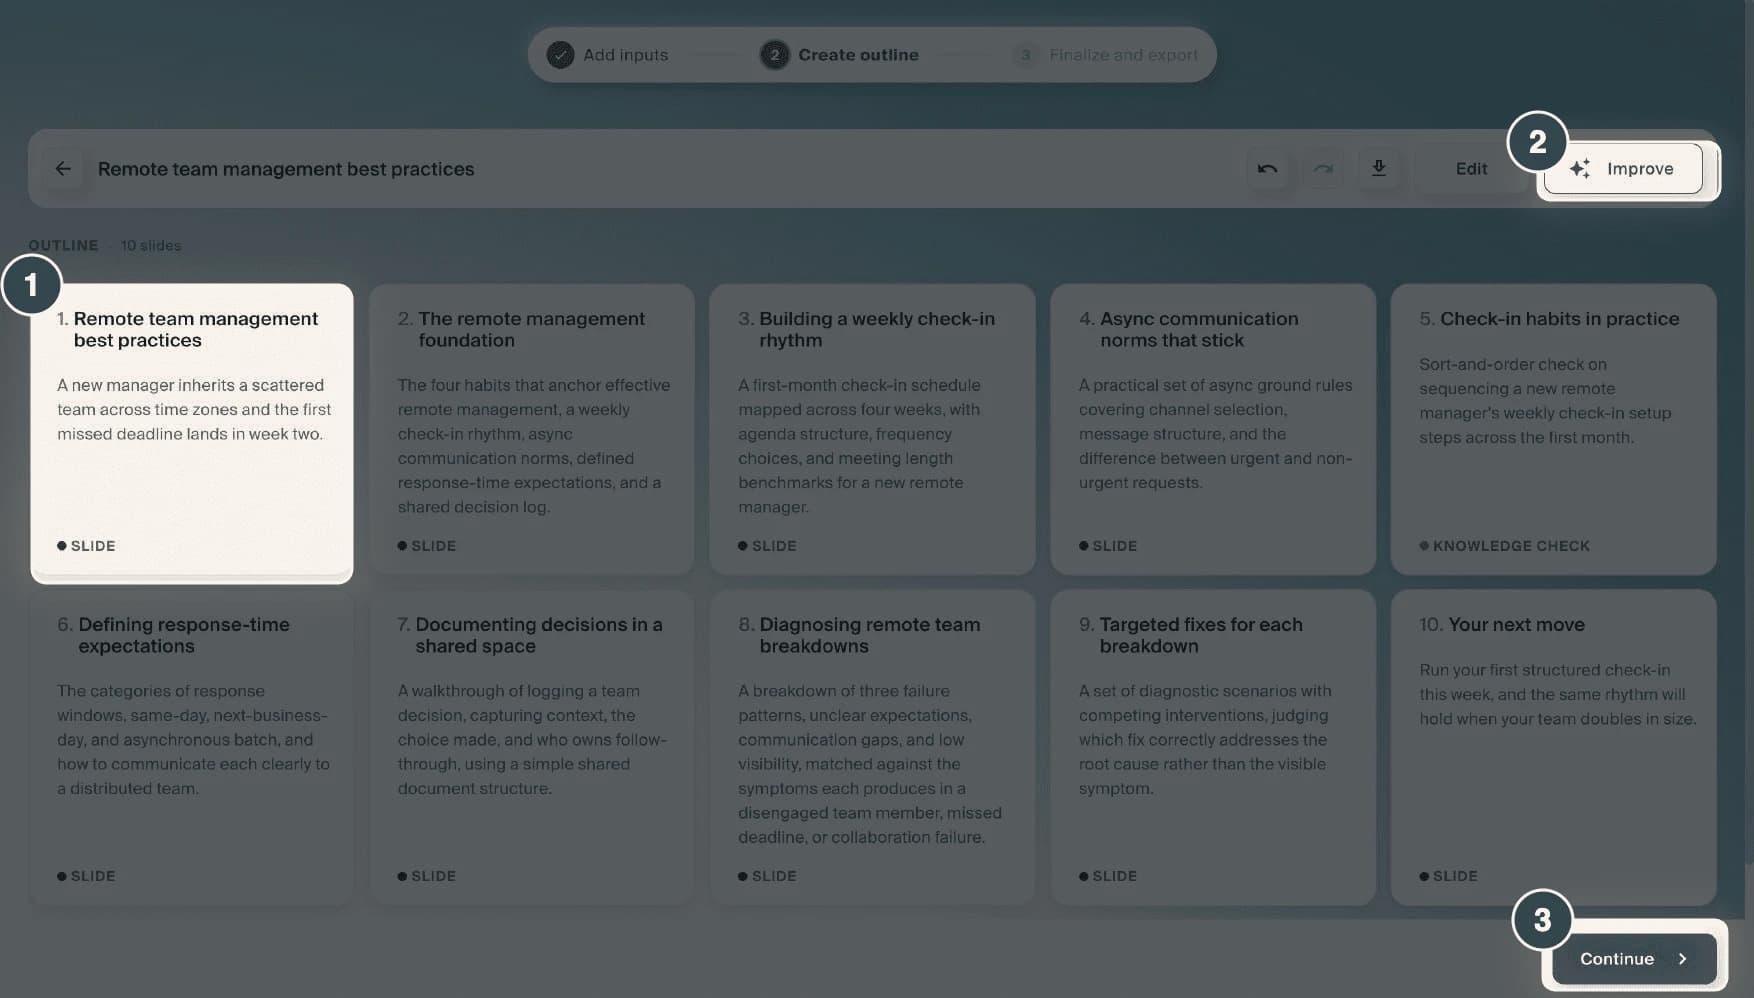
Review the storyboard Creatium builds before it becomes slides:
- Review the AI-generated outline. Each card becomes a slide or an interactive. Edit any card directly if you want to adjust it.
- Refine the whole outline using the Improve icon, giving instructions to reshape it all at once.
- Select Continue once you are happy with the storyboard, to convert the outline into slides.
Editing your interactive lesson
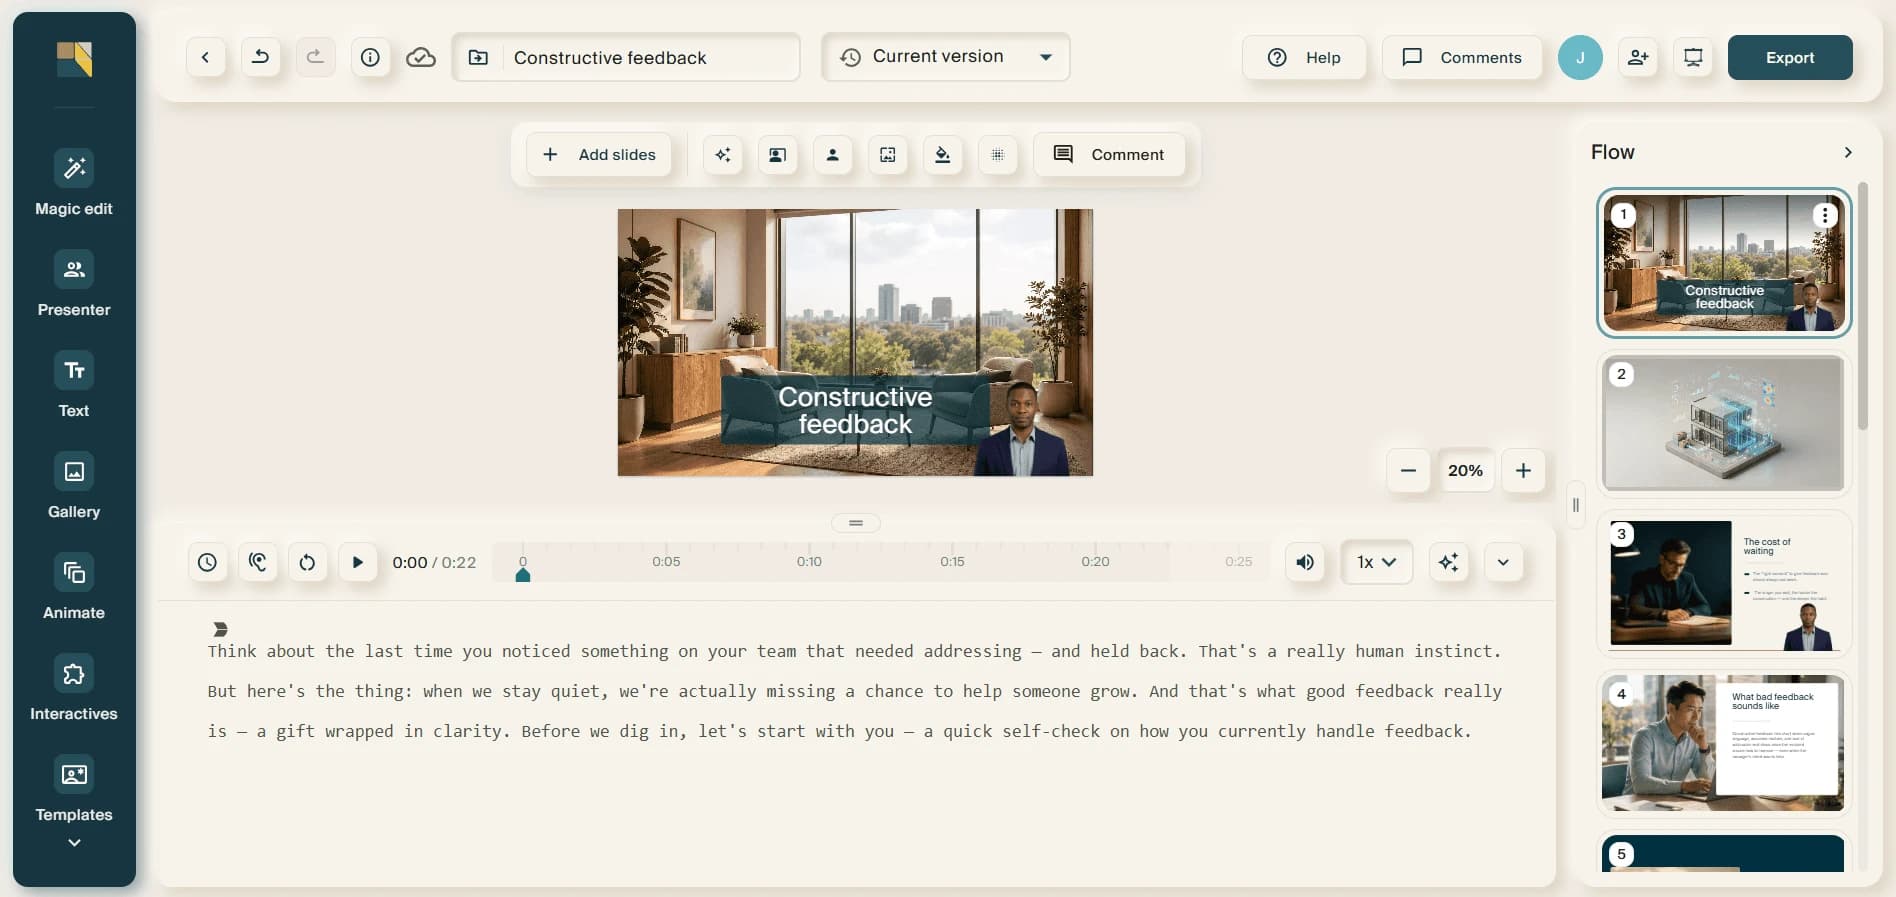
Step 1: Your editor's workspace
This is your editor's workspace, where you can edit things. From here you can update your slides and narration, replace images, add elements from the left toolbar, and preview your lesson as you go.
Step 2: Refine with Magic Edit
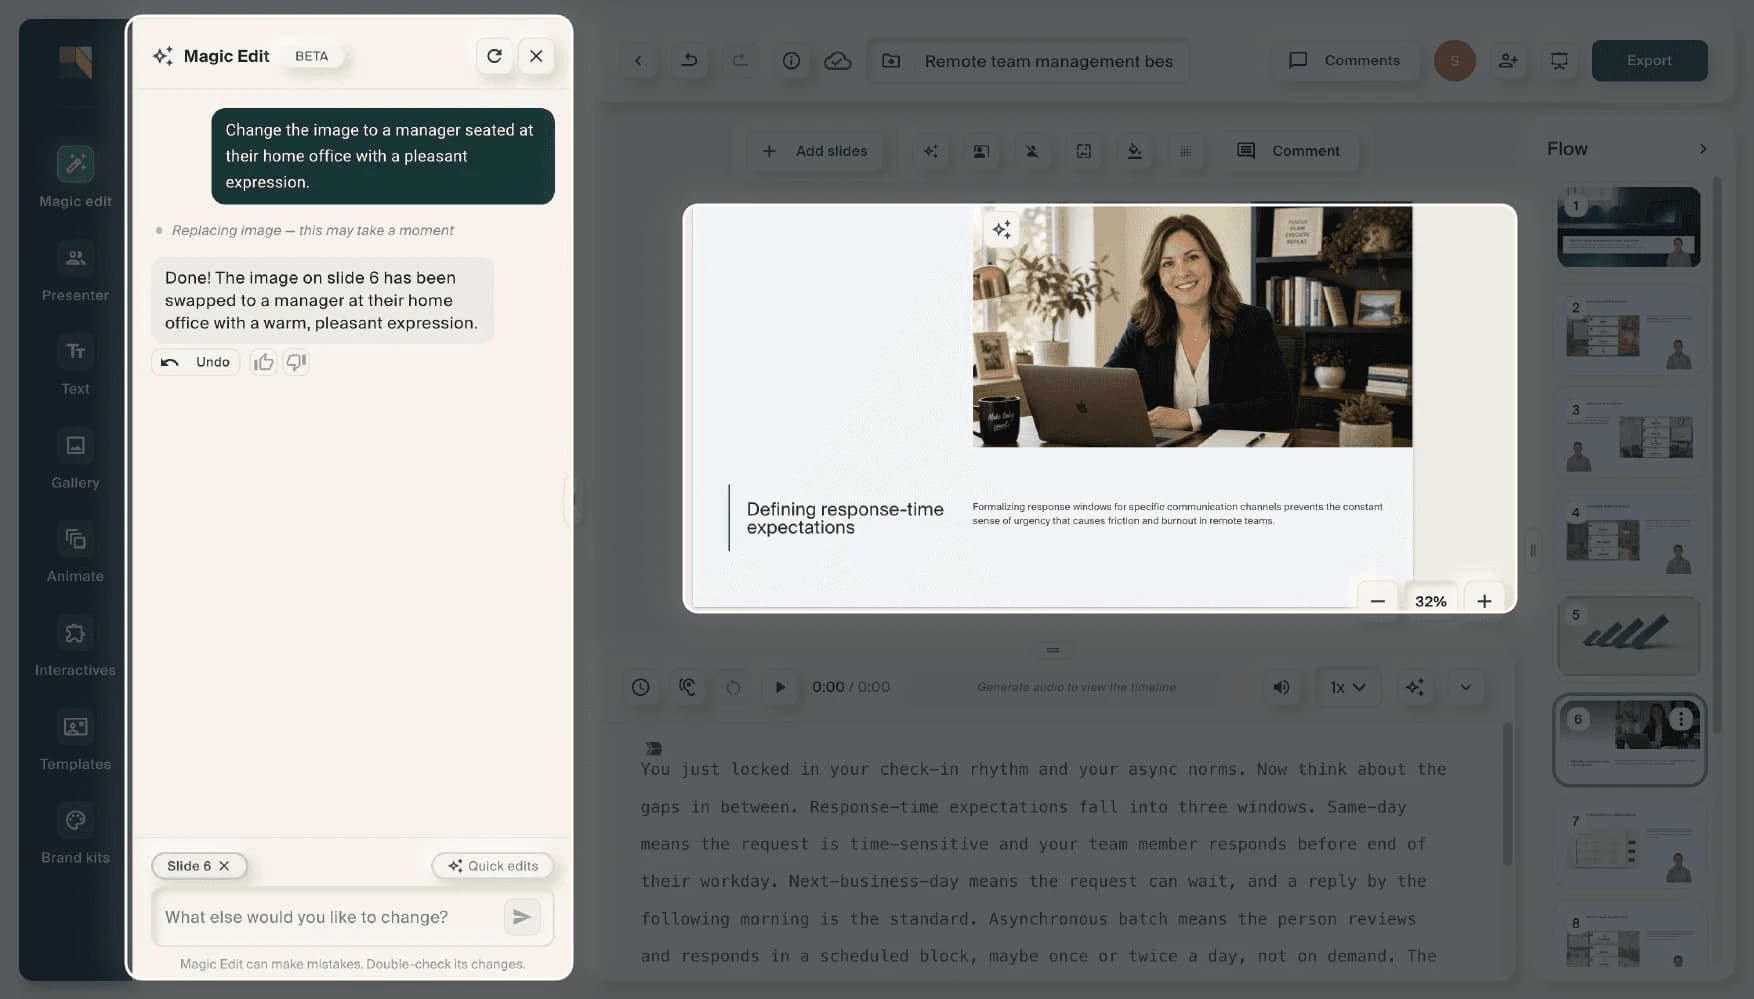
Use Magic Edit to make changes by simply describing them. Open Magic Edit from the left toolbar, or click the Magic Edit button on any slide element, then type your instruction, for example changing an image, rewriting text, or adjusting the narration. Magic Edit applies the change for you, and you can undo it if needed.
Step 3: Add your interactive elements
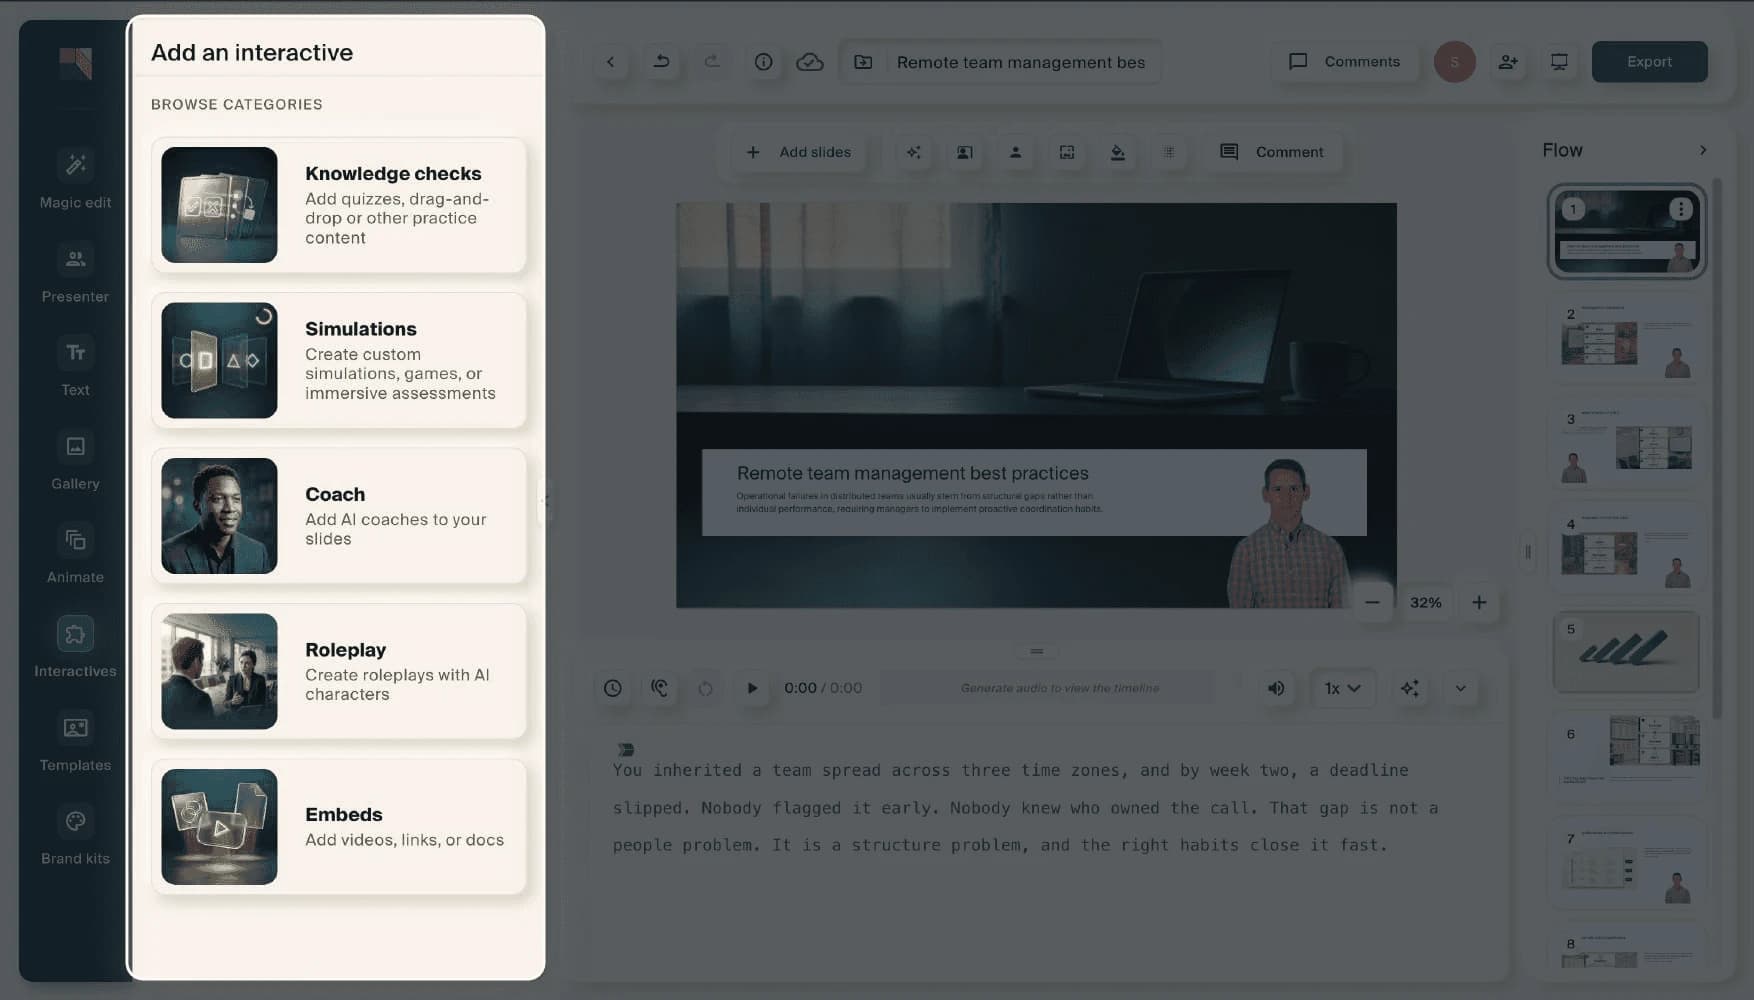
Navigate to the left panel and select the “Interactives” button.
Select your interactive type:
- Knowledge Checks: Add quizzes, drag and drop, and more.
- Simulations: Add custom simulations, games or immersive assessments.
- Coach: Add AI Coaches to your video.
- Roleplay: Create roleplays with AI characters.
- Embeds: Add published videos as files or YouTube links, PDFs, excel sheets, or website URLs.
Generating your interactive lesson
Step 1: Export as an Interactive Video
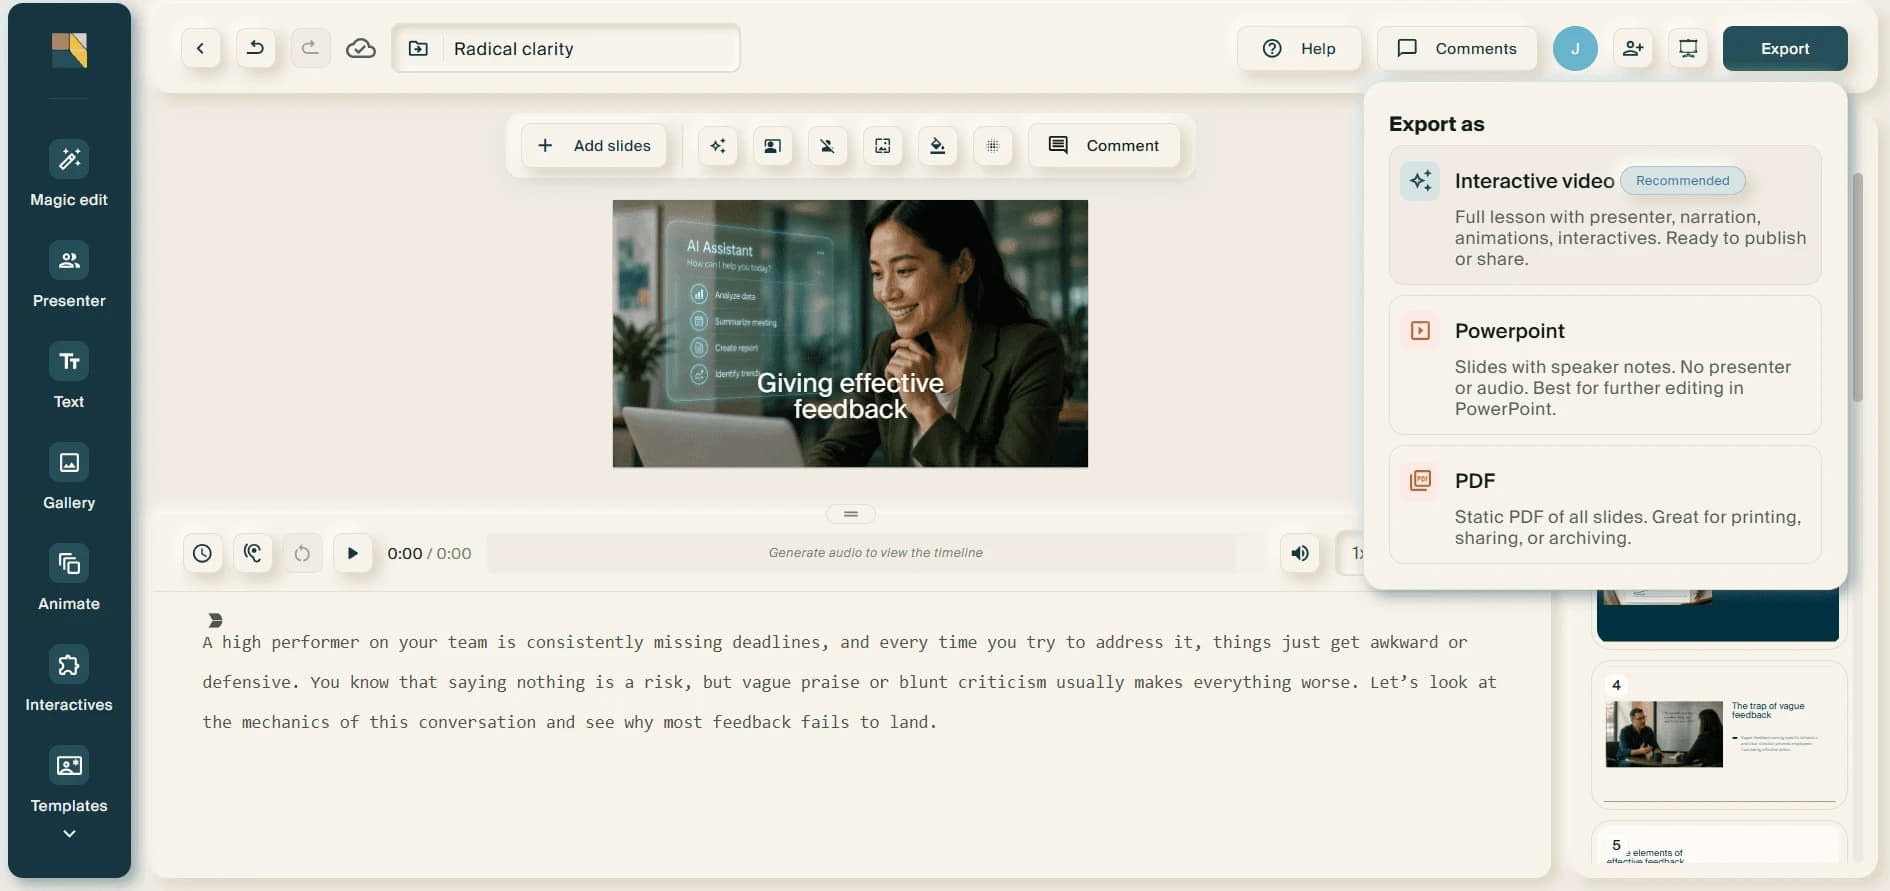
Select Export at the top right, then choose Interactive Video. This produces the full lesson with presenter, narration, animations, and interactives, ready to publish or share.
Step 2: Review the audio
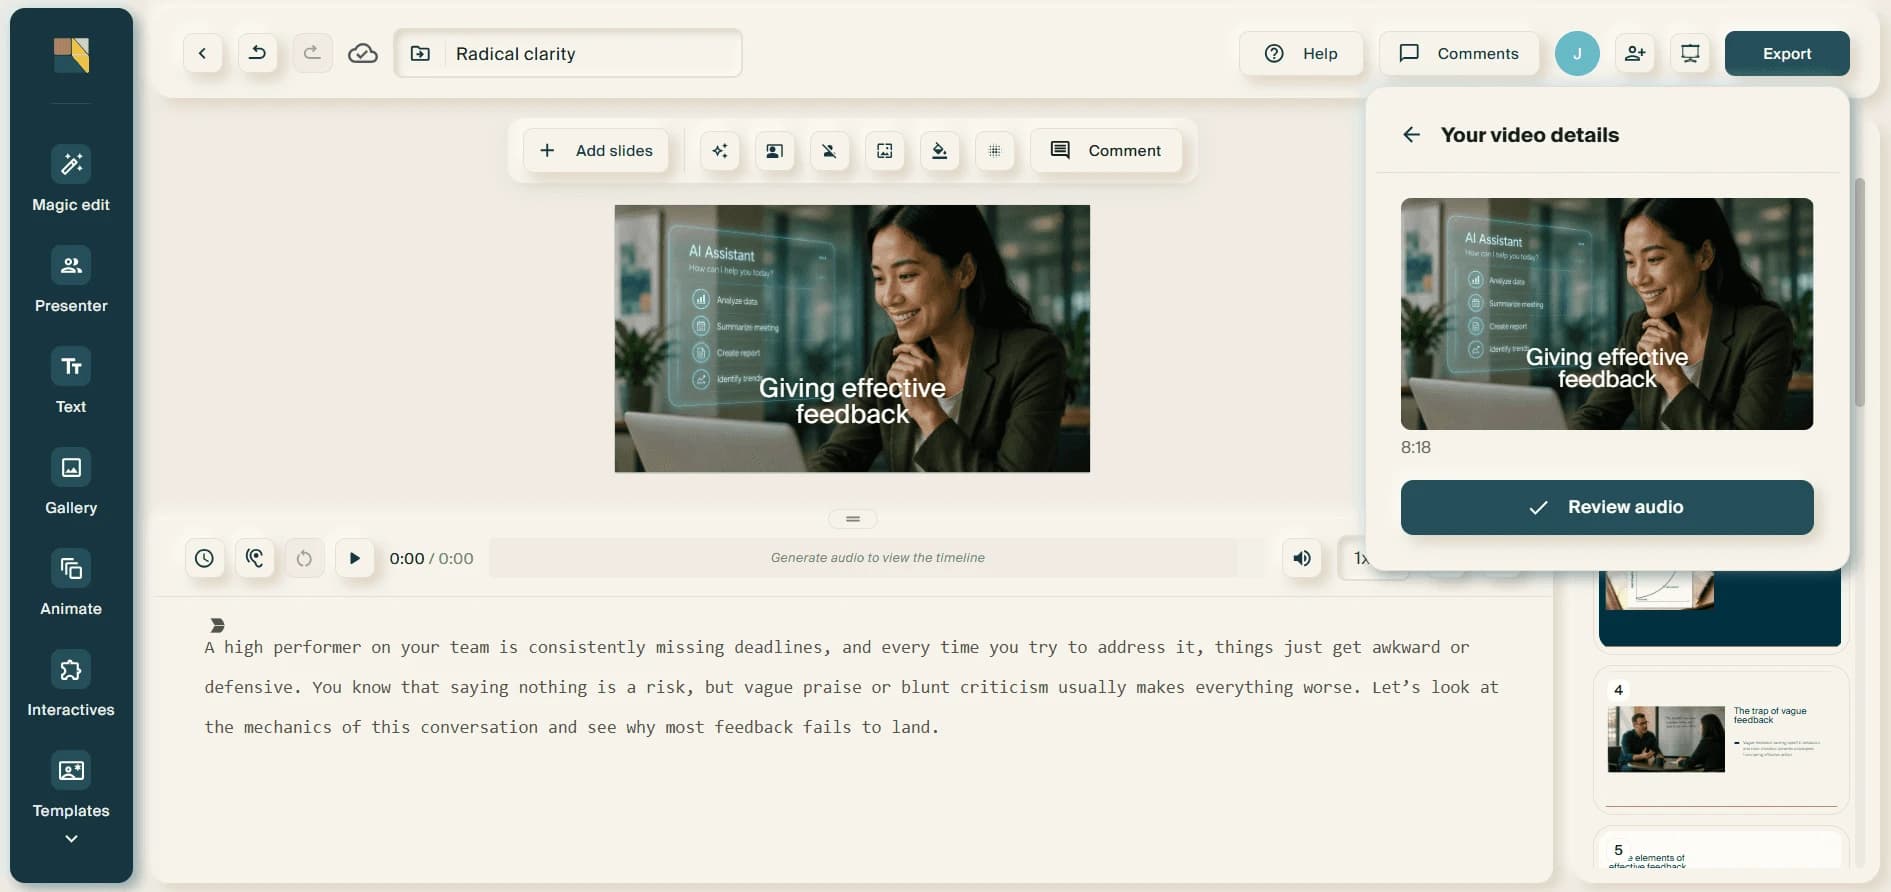
Creatium shows your video details, including the estimated length. Select Review audio to check the narration before the video renders.
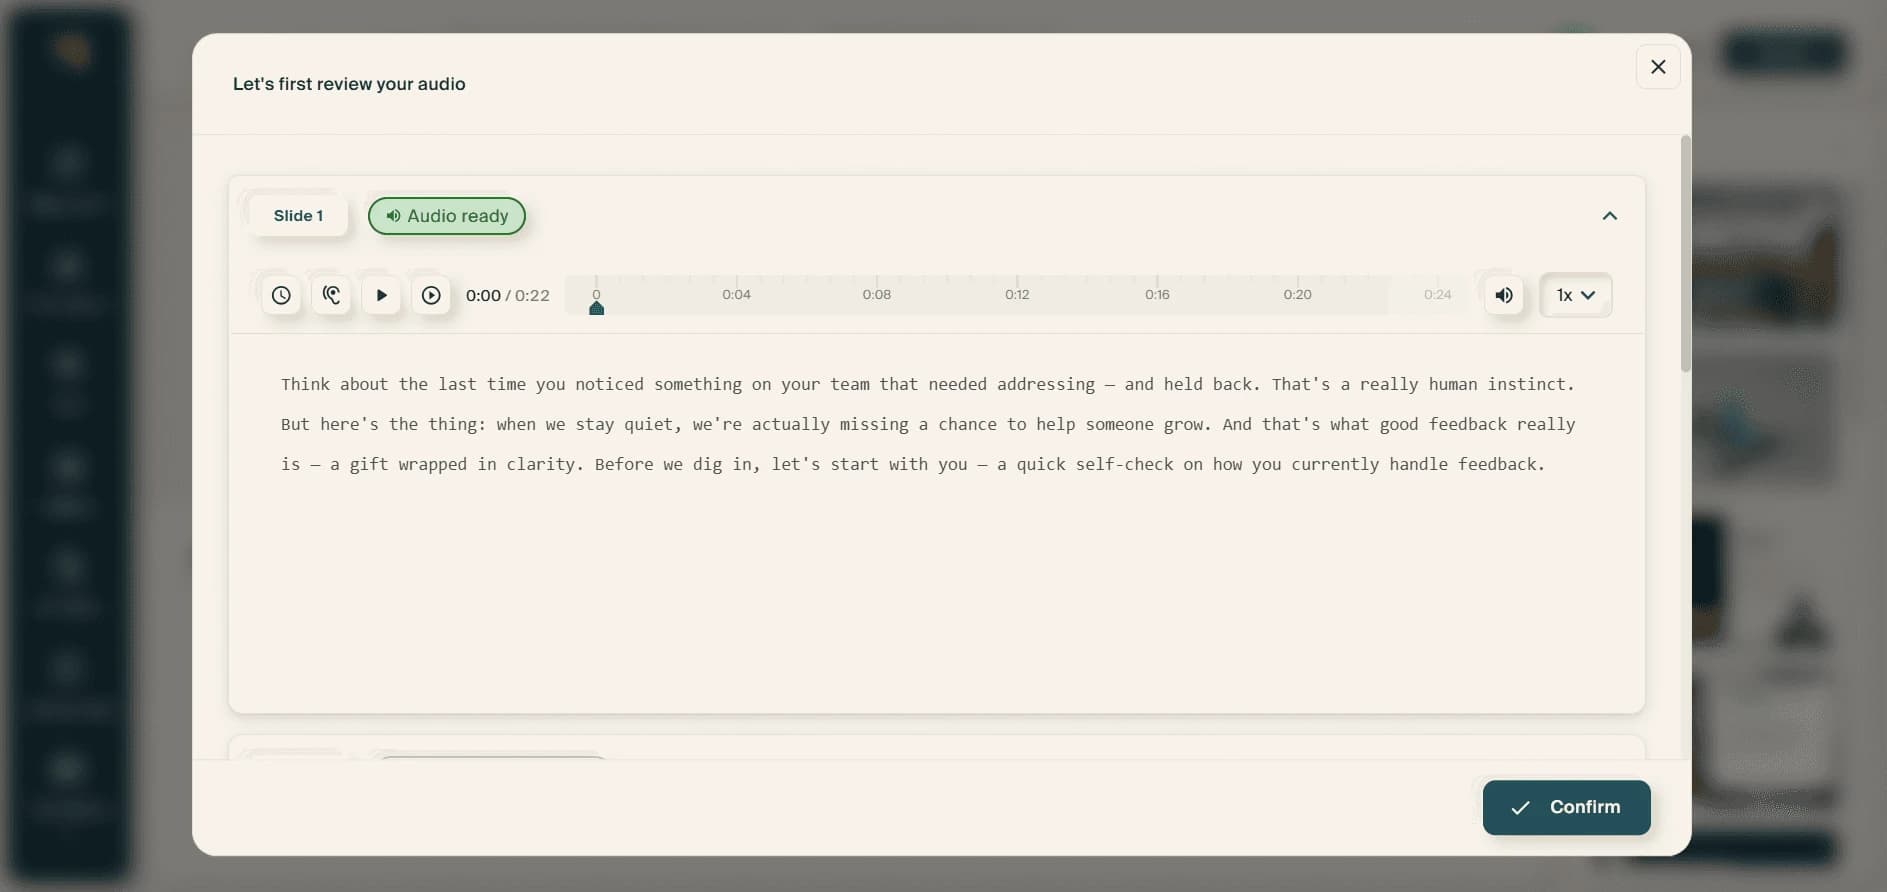
Step 3: Review your audio slide by slide
In the review overlay, listen to the generated narration for each slide. Each slide shows an Audio ready status once its narration is prepared. When everything sounds right, select Confirm to start generating the video.
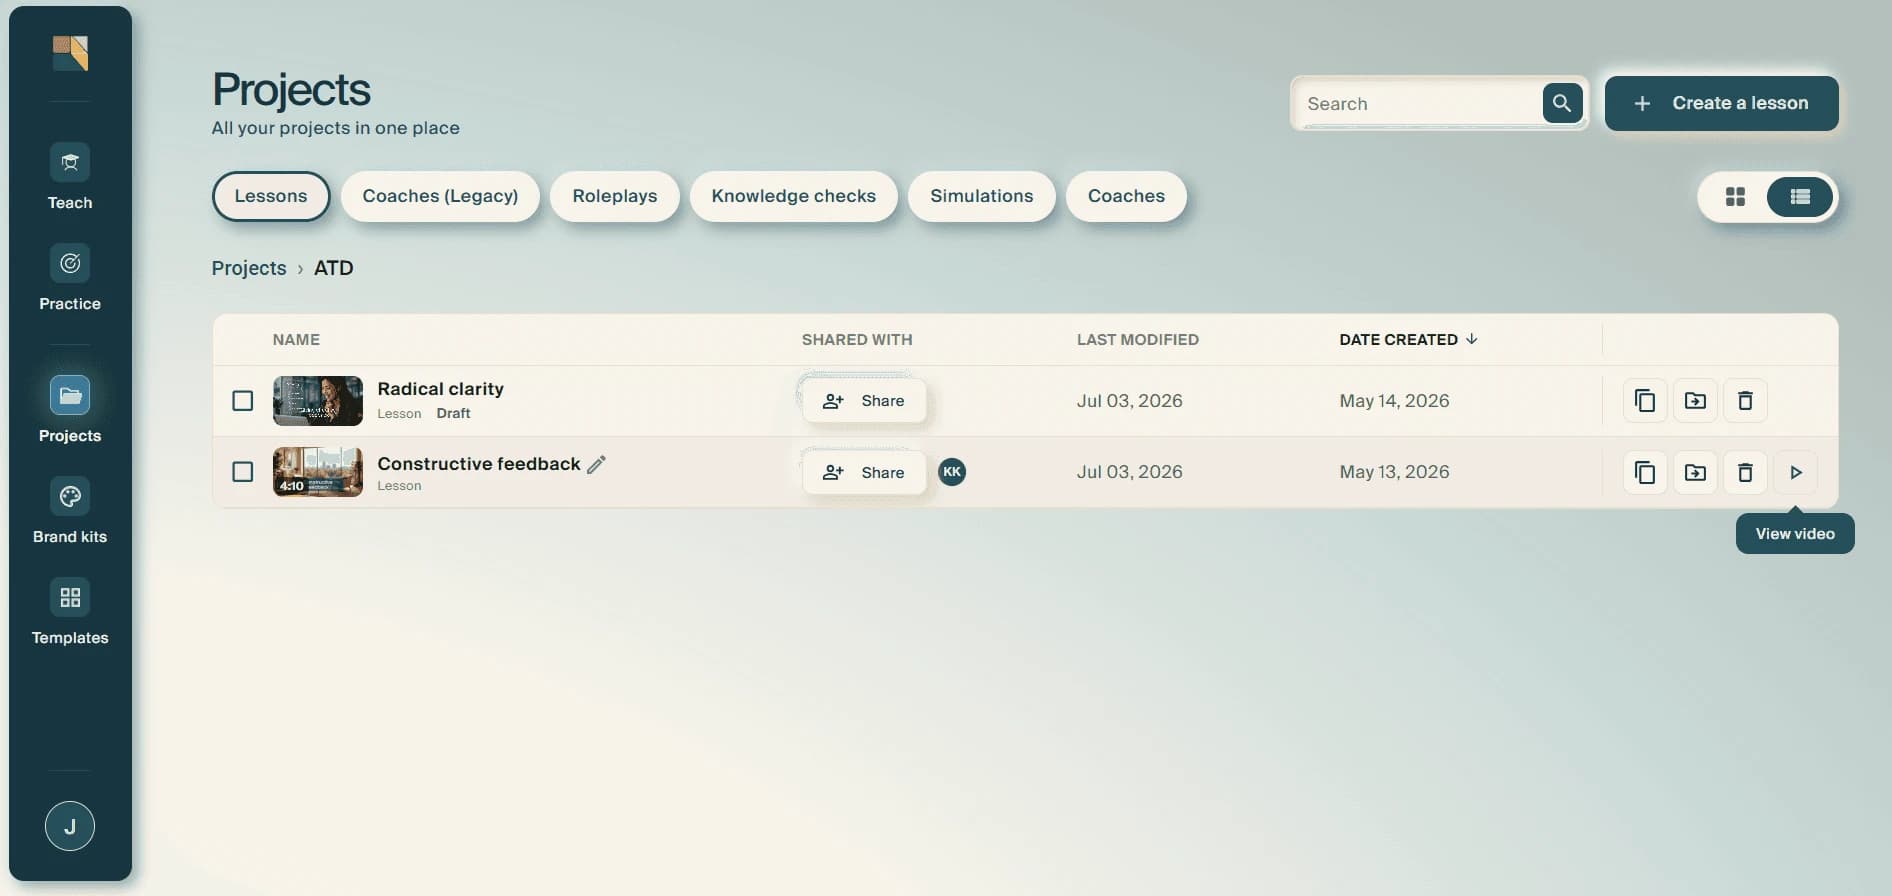
Step 4: Find your video in Projects
Go to Projects to track your video's render status. Once it is complete, select View video (the triangle button on the right) to open it and continue to publishing.
Publishing your interactive lesson
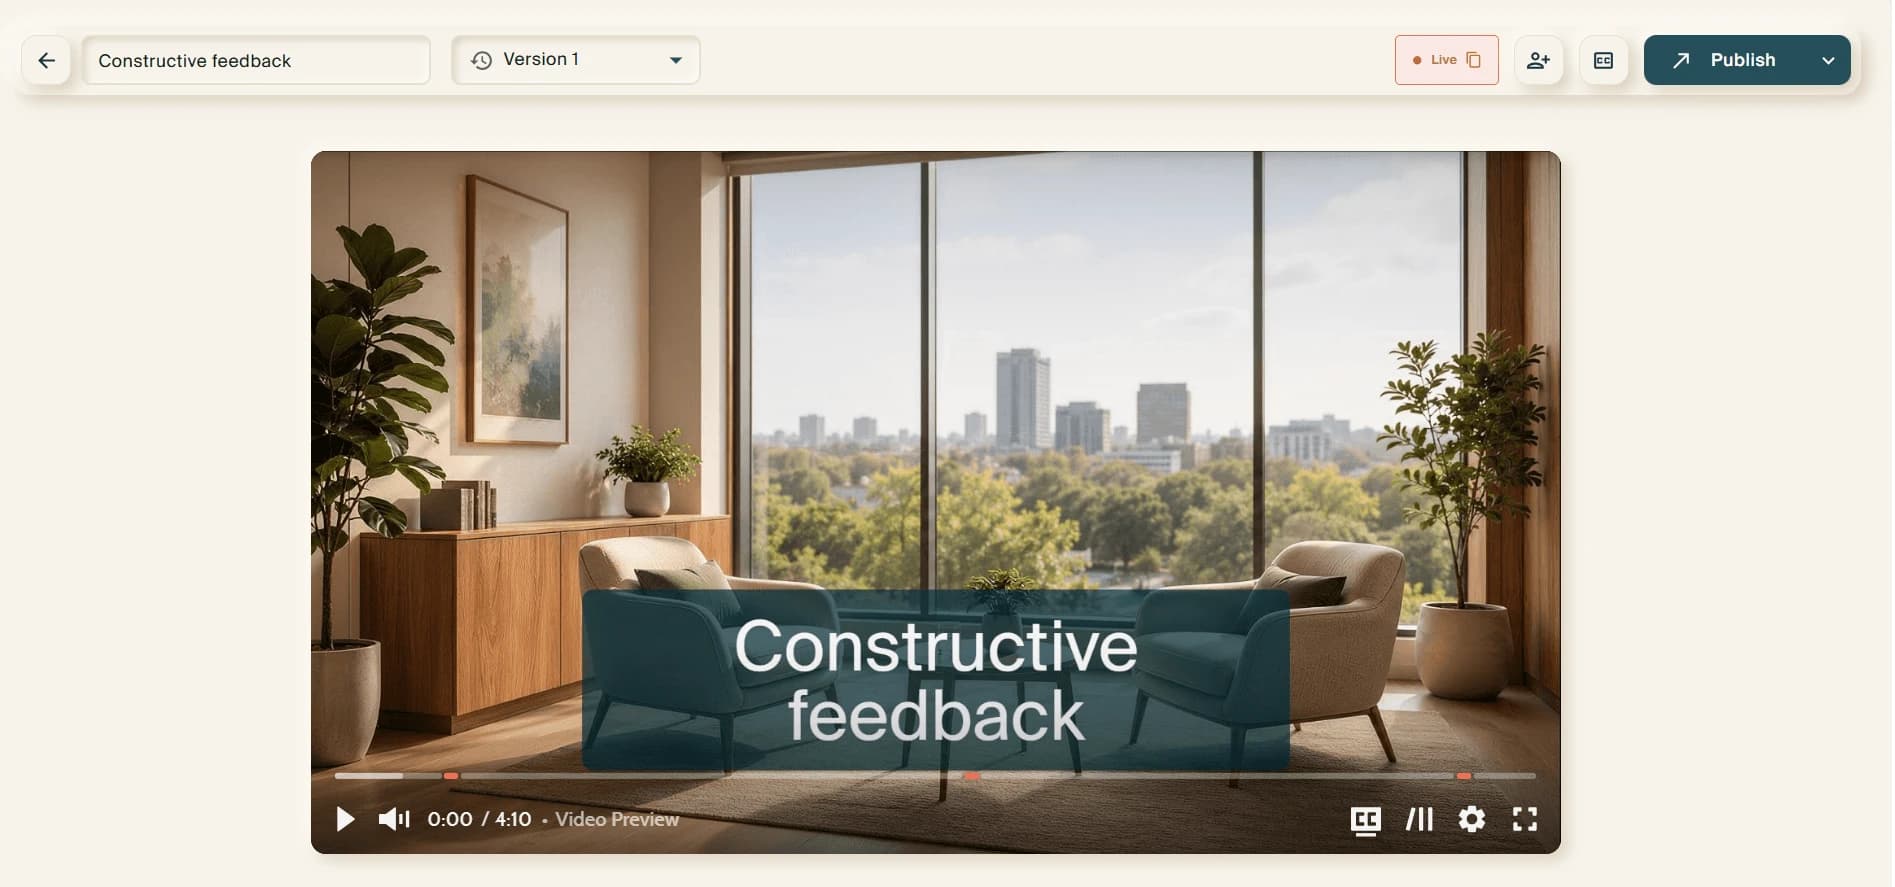
Step 1: Open your video and publish
With your video open in the player, review it, then select Publish at the top right to begin sharing.
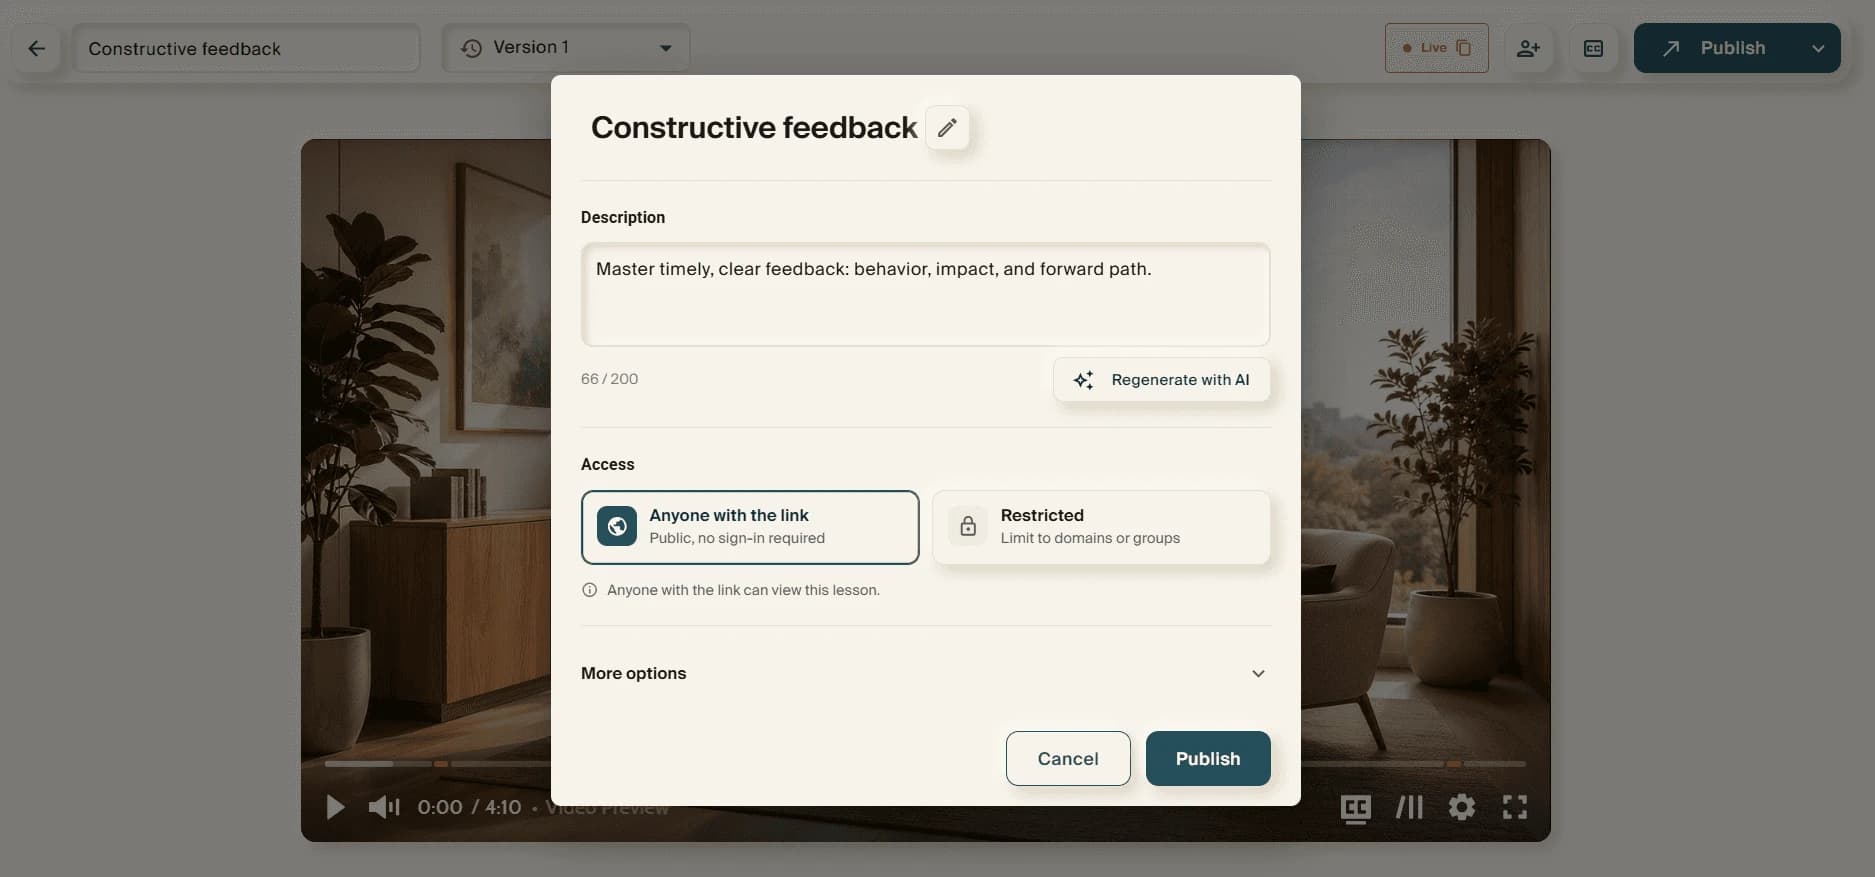
Step 2: Add your video details
Add the details learners will see, including a title and description, and set access to either Anyone with the link or Restricted. When you are ready, select Publish.
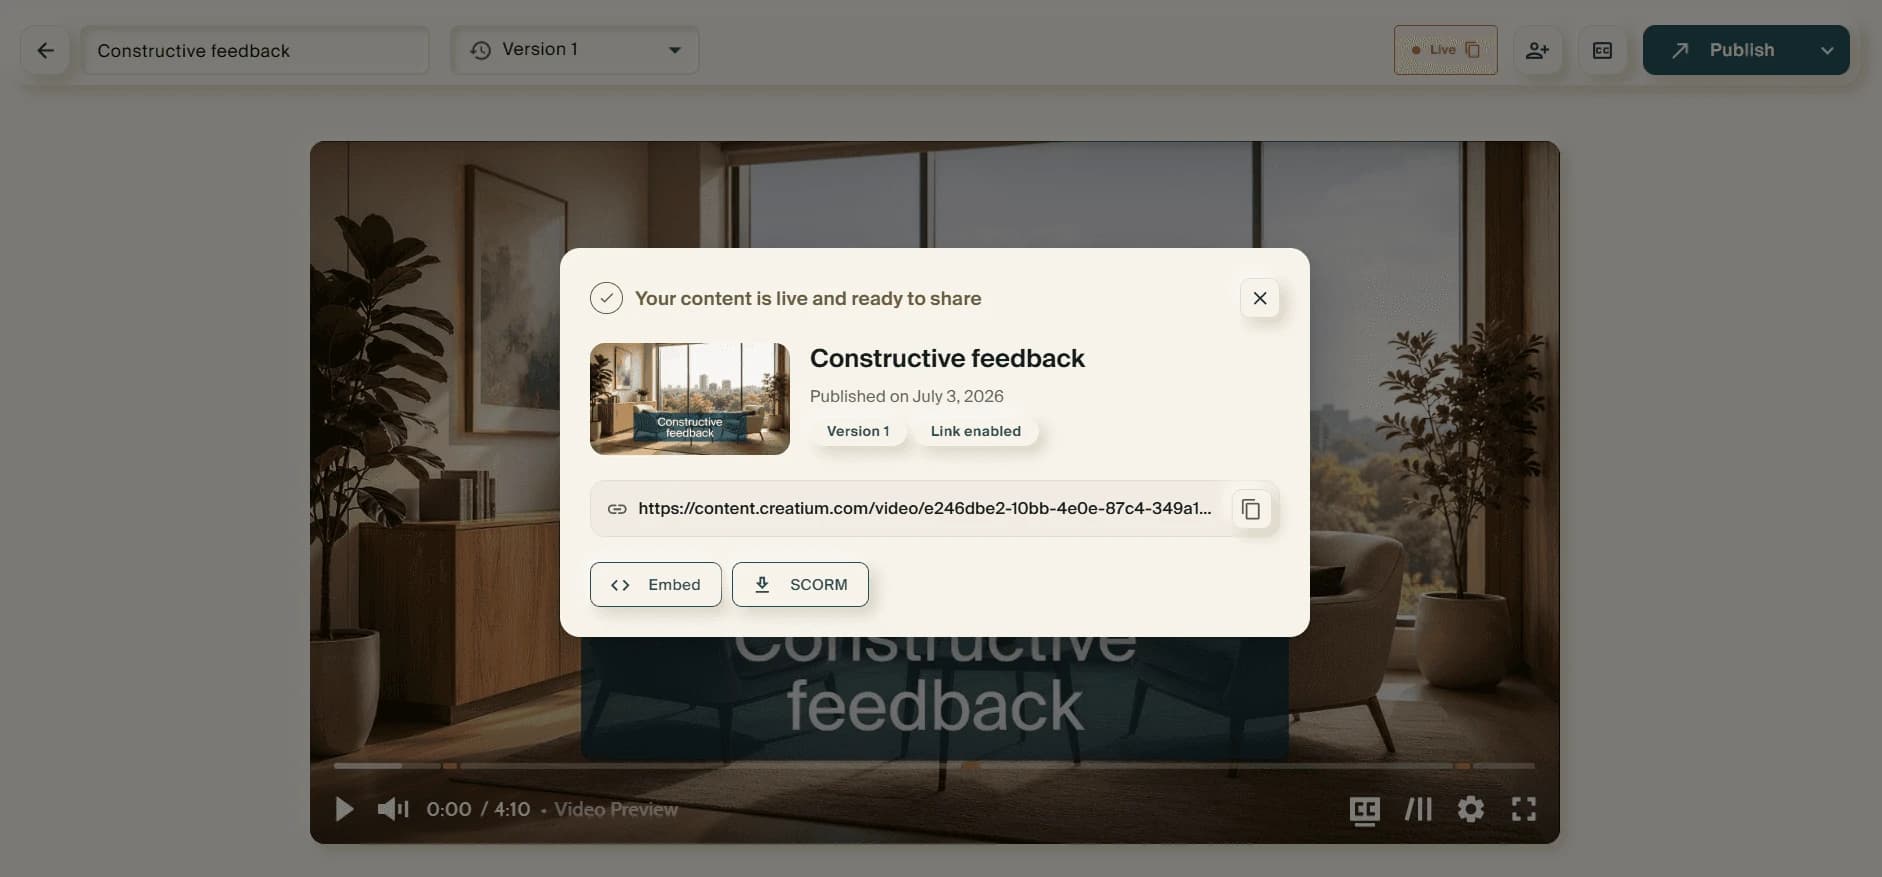
Step 3: Your content is live
Your lesson is now live and ready to share. Copy the link to share it directly, or use Embed or SCORM to place it in a website or your LMS.